Your motorcycle’s chain transfers engine power to the rear wheel, making it one of the hardest-working components on your bike. Regular maintenance extends its life, prevents costly repairs, and keeps your ride smooth. Understanding cleaning technique, lubrication timing, and replacement intervals helps you get maximum miles from this critical component.
Cleaning your chain removes grit and old lubricant that cause premature wear. The process takes about 15 minutes and should happen every 500-600 miles, or more frequently in wet or dusty conditions.
Start by warming it up with a short 10-minute ride. Warm chains release dirt more easily. Next, park on a center stand or rear stand to lift the back wheel. Place cardboard behind to catch spray.
Apply motorcycle-specific cleaner liberally to the entire length, rotating the rear wheel to ensure complete coverage. Then, let it soak for 3-5 minutes. Avoid household degreasers or dish soap, which can damage seals on modern bikes.
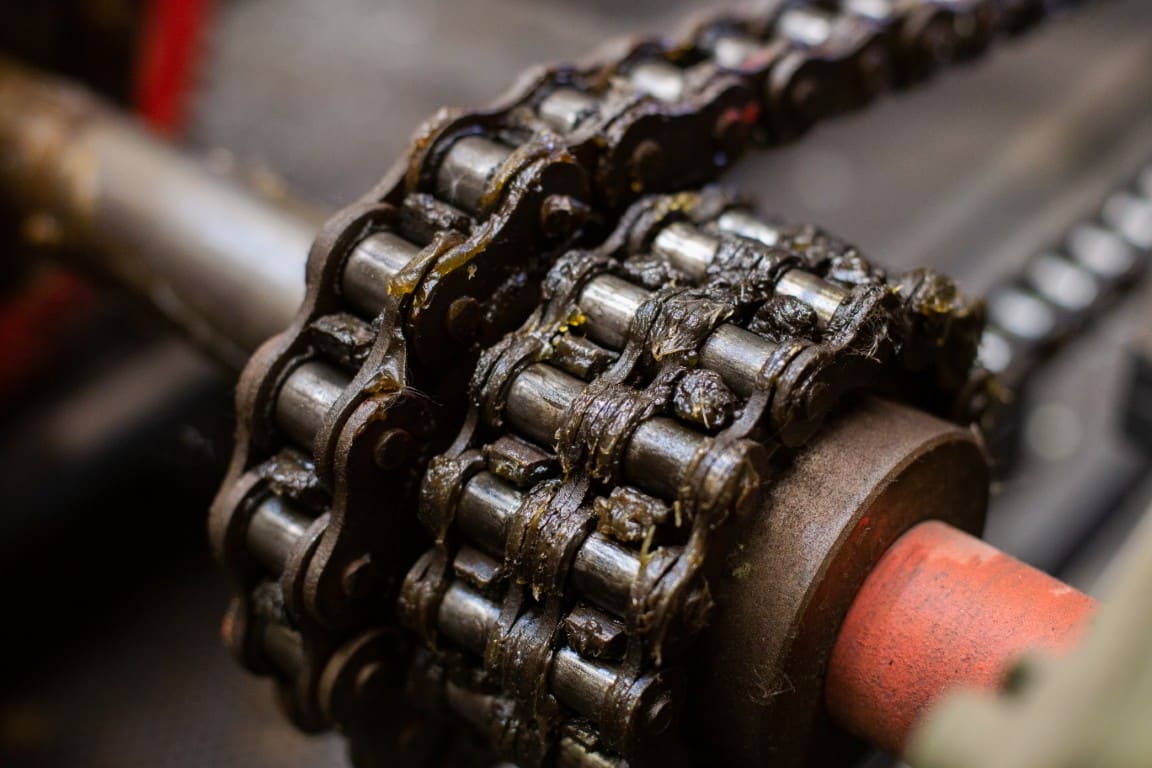
After soaking, use a brush or an old toothbrush to scrub all sides, including inner links where dirt accumulates. A grunge brush cleans three sides simultaneously. Additionally, scrub the sprockets too, especially between the teeth where rollers make contact.
Once scrubbing is complete, rinse with water using a hose on light pressure or a damp cloth. Avoid high-pressure washers, which can force water past seals and flush out internal lubrication. Wipe dry and let it air dry for 10-15 minutes.
For stubborn grime, kerosene works well. Many manufacturers recommend it because it cuts through buildup without damaging seals.
Once clean and dry, apply specific lubricant to the inner edge where rollers and seals meet. This is where it penetrates. In contrast, spraying the outer plates accomplishes little, since the lube flings off while riding.
Hold the lubricant nozzle about one inch from the inner links and slowly rotate the rear wheel. Apply steadily as it moves past, coating the entire length.
After application, let the lubricant set for 5-10 minutes before riding so it can penetrate and settle. Then, wipe excess from the outer plates to prevent slinging onto your wheel.
As a general rule, clean and lubricate every 500-600 miles under normal conditions. However, Chicago riders should clean more frequently during winter when salt accelerates corrosion, or after rain. Wet conditions introduce more contamination.
Lifespan varies significantly based on several factors. Generally, a well-maintained one typically lasts 15,000 to 30,000 miles. Sealed versions, which use O-rings or X-rings to keep lubricant inside links, often reach the higher end or beyond. In contrast, standard types without seals wear faster and may need replacement closer to 15,000 miles.
Beyond type, riding style dramatically affects longevity. Aggressive acceleration, hard braking, and frequent high-speed riding create more stress than smooth, steady riding. Sport bikes wear through them faster than cruisers because of higher power output.
Environmental conditions matter too. Riding on clean, dry pavement extends life. On the other hand, frequent exposure to rain, mud, dust, or winter road salt accelerates wear and promotes rust.
Most importantly, regular maintenance extends lifespan significantly. Consistent cleaning and lubrication make them last substantially longer. Keeping the correct tension also matters. Too-tight adjustments stress links and sprockets. Conversely, running too loose can cause skipping teeth.
Visual inspection reveals when replacement time approaches. First, check for rust, particularly on inner links where moisture accumulates. Surface rust might clean off, but deep pitting indicates deterioration beyond safe use.
Next, look for stiff or kinked links that don’t flex smoothly. These tight spots create uneven wear and rough power delivery. Everything should move freely along its entire length.
To measure stretch, pull away from the rear sprocket. If you can lift it far enough to expose more than half a tooth, it has stretched beyond safe limits. Check multiple spots since wear isn’t always even.
Inspect sprocket teeth carefully. New teeth have rounded or squared tips with consistent valleys. Worn teeth develop sharp points or hook shapes like shark teeth. When sprockets show this damage, replace both components together. Installing a new one on worn sprockets causes rapid deterioration.
Finally, listen for unusual noises. Grinding, clicking, or slapping sounds often indicate a worn or improperly adjusted drivetrain.
Before the riding season starts, especially after winter storage, inspect thoroughly. Bikes sitting idle collect moisture that promotes rust, and old lubricant breaks down. Therefore, fresh cleaning and lubrication before spring riding ensures smooth operation.
If you notice excessive wear, unusual sounds, or aren’t confident in measuring your own stretch, having a mechanic evaluate your drivetrain catches problems early. A worn one that breaks at speed creates dangerous situations and can damage engine cases or other components.
Ultimately, consistent care means smoother power delivery, better fuel economy, and avoiding roadside breakdowns. The few minutes spent on maintenance reward you with thousands of additional miles and reliable performance.